Saturday, August 20, 2022

1966 Barracuda Right Side Body Panel Repairs

(Work actually done 7/20/2021) From a distance, the car didn't look that bad on the right side. Upon closer inspection, there were several areas that needed significant attention. The first being the right rear quarter panel and fender.

1966 Barracuda Front Suspension Strut Rod Bushing Replacement

(Work actually done 7/1/2021) Do these strut rod bushings look ok? Nope, time for new ones.

1966 Barracuda Driver's Side Rear Quarter and Fender Bodywork

(Work actually done 2/27/2019) Time to start work on the rear quarters. Oh, joy. Bodywork is not my forte. But I figure that someone with an old car needs to put in the time to fix up things if they can. Sure I could hire it out but that's not my style if I can do the work myself. And my brother recently told me that when he had the car, he took it to a local well-known body shop (John's Auto Body in Poulsbo) to ask what they would charge to do body and paint. The guy looked the car over and said, "Tell you what, bring me $10,000 and I'll let you know when I need more."

On that note, here's the better of the two rear quarters that needs fixing:

1966 Barracuda Driver's Side Front Fender Repair

(Work actually done 7/12/2018) The fender on the Barracuda needs a little help. It has a boo-boo.

Friday, August 12, 2022

Duncan Model 60 Parking Meter

I picked up this gem a couple of months ago while on a small anniversary celebration trip to Fairhaven, near Bellingham. We were walking around town and came across a small hole in the wall eclectic store that had quite the assortment of "stuff". Amongst the stuff was this parking meter. I've always been intrigued by them, so the $35 asking price sounded very reasonable. Home it came.

Monday, July 25, 2022

Unimat-SL DB-200 Motor/Spindle Bracket Modification

I may have said in the previous post that there would probably be no more projects on this lathe. Well that didn't prove true. I decided to do some whittling on the motor bracket. The reason for this bit of work is because the hunk of steel that encompassed the spindle was way too stiff, and the screw that clamps the bracket to the main spindle needed to be tightened a bunch for the clamping action to do its job. I figured if I removed some metal on the bracket, it would be easier to clamp. Here's what I started with. The red is the main part I planned on cutting out, plus a few minor touch-ups.

Unimat-SL DB-200 Tommy Bars and Marking (Zeroing) Pin

7/4/2022 update:
I did a little fiddling on the lathe today. I made two more Tommy bars. What I started with were two punch blanks that my dad had picked up from somewhere eons (50 years?) ago (or maybe he even made them in school shop, who knows). They had never been hardened, so I used two of them as a starting point.

Thursday, June 30, 2022

Unimat-SL DB-200 Teensy Weensy Micro Mini Lathe

I'm not sure I can call this a real lathe but it was marketed as one. And it does make chips. Very small chips. Someone online said, "it makes steel wool." I now know what they mean. But this lathe wasn't bought to make stuff on a regular basis. I mainly got it because it is so cute and comes in its own little box.

Tuesday, June 14, 2022

1957 Petter Diesel Engine Gets A New Air Cleaner

Prior to buying this engine, I'd called the previous owner and asked him some questions. One was about the air cleaner, or more accurately, about the missing air cleaner in the photos. I asked if he had the air cleaner. He said something to the effect that it does have an air filter but not the original. When I went to buy the engine, the below photo is what I found mounted on the engine. It's the white pleated thing. He said it was a vacuum cleaner filter (!) but it works fine.

Thursday, June 2, 2022

Installing The Choke In The Cushman

Well that didn't go as planned. Yesterday when I made the choke screws, I figured I'd have the choke butterfly installed in a half an hour, tops. What I failed to remember was that not only the choke butterfly and screws were missing, but also a choke rod spring was missing. Ok, so no big deal. I'll just rummage through my small assortment of springs and find one that works. Not so fast, cupcake. I did find a spring that looked like it would work, but upon further inspection, it didn't fit over the choke rod casting. No big deal, I'll just heat up the spring, anneal it, bend it around some, then re-harden it. After two failed attempts, I finally realized it would be faster and easier to just re-shape the spring without all the annealing/hardening business. Fortunately, the spring I'd found was long enough that I could sacrifice two failed attempts and still have enough spring material to make a third one. This first photo shows the finished product and the two failures.

Wednesday, June 1, 2022

Cushman Carburetor Choke Butterfly And Screws

When I got this Cushman, the choke cable had been disconnected from the carburetor. The previous owner said the cable was rusted and stuck, which it was, but he failed to mention to me that the choke butterfly and screws were not in the carburetor. He said he'd been through the carburetor, so he knew the butterfly was missing. No matter, I was sure I could find the missing parts online. Nope. Apparently this Keihin carburetor is maybe specific to this type of engine, I don't know. The engine does start fairly easily without a choke but in the wintertime, I'm sure a choke would be helpful. So what's one to do? Why, make the missing parts, of course. Here's what I had to start with:

Thursday, May 19, 2022

1985 Cushman Turf-Truckster

A couple weeks or so ago another toy followed me home. This one needs some love. Quite a bit actually, as do most things that follow me home. This is a 1985 Cushman Turf-Truckster.

Wednesday, March 16, 2022

1957 Petter AVA1 Diesel Engine "Overload Stop"

If anyone having an older Petter diesel engine has read the starting procedure in the manual, they've no doubt come across something called an Overload Stop. Folks may not understand what this mechanism does. I was one of those folks when I bought my 1948 Gibson D tractor that has a Petter AC1Z diesel engine on it. There was this funky lever that the instructions (and previous owner) said to move down and release. I (and the previous owner) had no idea what it did but I found out later that it is called "Overload Stop". And not until I got this new-to-me AVA1 engine did I realize what the Overload Stop actually does. On the AC1Z engine, the fuel injector pump rack is enclosed so I can't see what is going on, but on this AVA1, the pump and rack are hanging out there for all to see, and the Overload Stop is also right there. Well, if my engine had one, it would be right there, but unfortunately the Overload Stop contraption was missing. Not having anything better to do while recovering from rotator cuff surgery, I decided to make one today on the Smithy mill.

Sunday, March 6, 2022

1957 Petter AVA1 Diesel Engine Welding Broken Cast Iron Pump Gland Clamp

One of the cast iron clamps that seals the Gardner-Denver water pump shaft on the Petter engine's trailer is broken into three pieces and is missing some chunks. Someone had brazed it together in the past and filled in a lot of voids with what looks like JB Weld.

Saturday, March 5, 2022

1957 Petter AVA1 Diesel Engine Loose Flywheel

Ok, it's not as bad as the title sounds, but the flywheel was slowly working itself outward on the crankshaft. Thus the interference with the fan shroud that I'd noticed the first time I started this engine. I had previously spent a day tweaking the shroud around so it didn't scrape on the flywheel and I'd thought to myself that the shroud was sure a close fit to the flywheel, but it didn't dawn on me that the flywheel could be the culprit. Today I started the engine and noticed the rubbing noise again. Hmm, there must be something going on. I then realized the flywheel had moved closer to the shroud. Time to take action.

Wednesday, February 23, 2022

1957 Petter AVA1 Diesel Engine

Another project followed me home recently. And I fully admit I'm a sucker for "small" (a somewhat relative term in this case), older hand-crank diesel engines. This particular engine is a British Petter model AVA1 single cylinder diesel engine, and dates to approximately 1957. Without further ado, here's a photo:

Tuesday, February 15, 2022

Craftsman 313.54403 Oxygen Regulator Leak and Fix

 I bought a Sears Craftsman oxy-acetylene welding kit back in the 1970s. For the most part it's worked fine over the years but maybe 15 or 20 years ago the oxygen regulator began leaking such that the low pressure side would slowly creep up in pressure from the set point if the oxygen wasn't being used. A couple of days ago I decided to search the net to see if I could find a rebuild kit for the regulator. In the process I found a site where someone showed where he'd taken the sealing part out of his regulator and sanded it down to make it work again. Kind of. He said that the pressure still slowly crept up, 5 psi in 15 minutes, but that it was better than before, although he didn't say how quickly the creep was prior to the fix.

My regulator did a lot of creeping prior to me fixing it. The gauge went from 25 psi to 45 psi in 1 minute. Whoa. I knew of the issue so I just had to keep an eye on it when I was using it, and had to turn off the oxygen supply if I had to let the thing sit for any length of time. That got to be a pain. Time to take action.

Saturday, November 6, 2021

Smithy Granite I-Max Speed Control Repair

This will be short and sweet. My Smithy lathe/mill has had a flaky speed control potentiometer (pot) for the five years I've owned the machine. Problem is, it's been getting worse. The problem was that when I'd turn the speed control pot to zero, the motor would keep turning slightly, and it would be jerky. I went so far as to contact the company, and they said that I should just use the Stop button every time I want to stop the motor. They did also say a new pot might solve the problem but to still always use the Stop button.
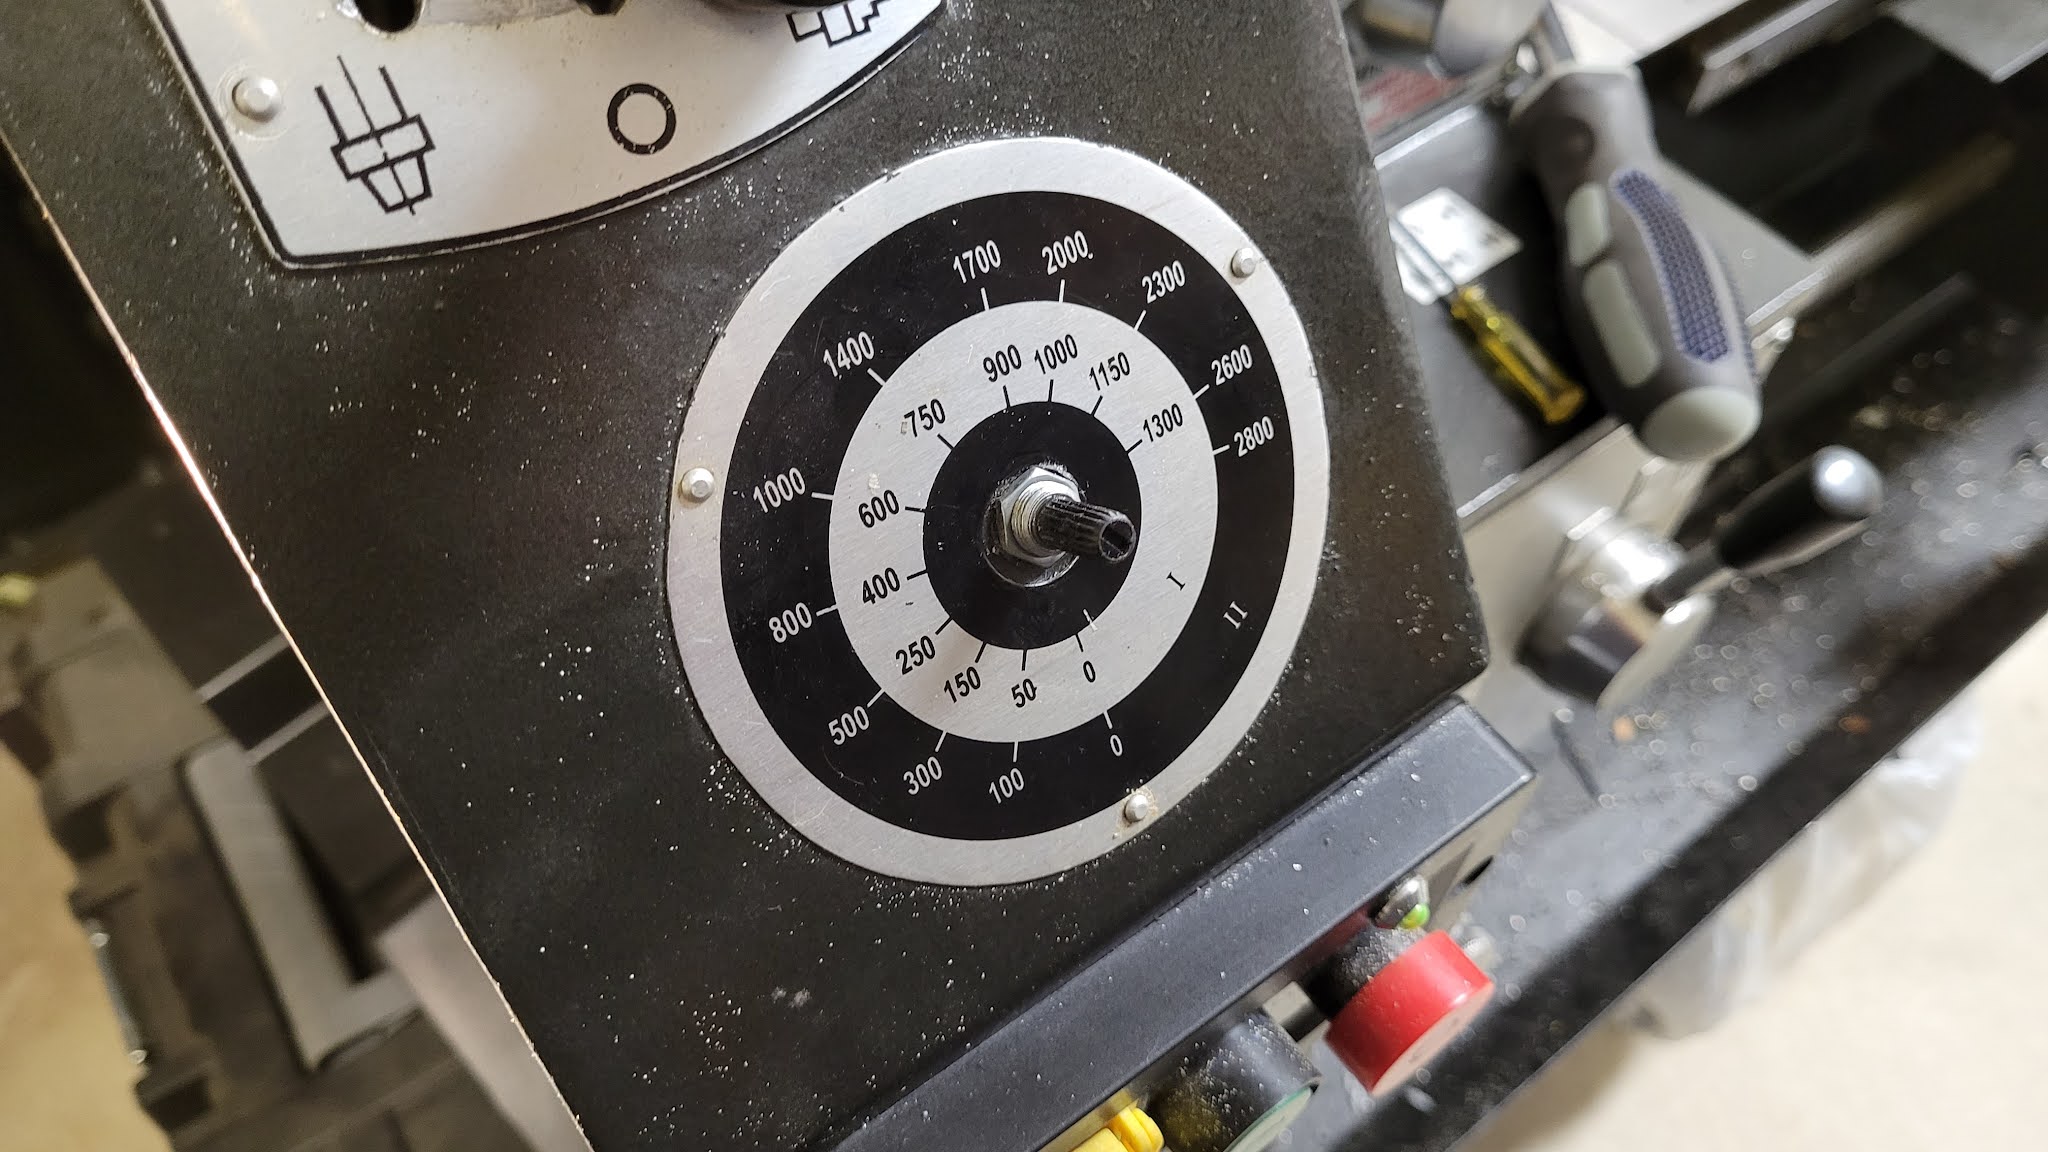
I decided today to see what I could see inside the pot, so I removed it from the machine to take a good look at the innards.

Wednesday, November 3, 2021

All-Power 800 Watt 2-Cycle Generator - Carburetor Repair

Our daughter bought a house a while back and it came with this small generator, I presume to run the fridge. The previous owner left the generator (and a lot of other things, like a lawn mower) when he moved. I'm guessing he knew the generator (and mower) condition, which is why they were left behind. The generator (and mower) didn't run. Gas started dribbling from the generator's carburetor bowl when I turned on the fuel petcock, so I knew at a minimum the carburetor had to come apart.

Monday, November 1, 2021

Igaging EZ-View DRO Plus Digital Readout Installation on Smithy Granite I-Max 1340 Lathe/Mill

I finally decided to install a set of DROs on my Three-in-One Smithy I-Max 1340, and I chose the inexpensive Igaging EZ-View set off eBay. I can't hardly go wrong for $150 including tax and shipping. The set came with a 6", 12" and 36" DRO.

The simplest one to start with was the mill quill, as I'd previously mounted the Smithy version (which came with the pile of goodies I'd gotten with the lathe) and so the mounting brackets could be used with no modifications. It was just a matter of unscrewing the Smithy scale and replacing it with the Igaging unit.

Saturday, August 14, 2021

Belco Generator Flooded

So I went to start the Belco generator a couple days ago. I opened the gas petcock, set the choke, wrapped the pull cord around the engine pulley and gave it a tug. No fire. I pulled again. Still nothing, but the carburetor was gushing fuel out its vent. Well that's not supposed to happen. I figured the needle valve was stuck in the carburetor so I pulled the carburetor fuel bowl cap off after shutting off the gas petcock. Gasoline was full to the top of the bowl. I pulled the float and needle out to clean the needle and noticed there was a-sloshin' a-goin' on inside the float. I turned the float over and found a small divot in the middle of the float:

Saturday, August 7, 2021

Belco Generator Brochure and Manual

I happened to look on eBay for the word Belco to see if anything popped up, and to my surprise two items were there. They were a sales brochure showing the range of generators Belco sold and a general instruction manual. Of course I had to buy them. This first scan is the brochure front cover.

Tuesday, August 3, 2021

Belco Generator Updates and a Repair

I spent the day today making stuff for the generator. The first project was a muffler. I used a small section of exhaust pipe for the main body of the muffler that I'd previously cut from the '96 F250 tailpipe when I installed a turn-down tip. I had a very large washer that I used for the backside of the muffler and I used a piece of sheet metal for the front cover that would eventually get holes drilled into it.

Monday, August 2, 2021

The Belco Generator Lives!!

Knowing nothing about the condition of this engine and generator head, I decided to just dive in and start fixing things, with the magneto being first on the list, as usually the magneto is the most trouble-prone component on these old engines. This Wico Type C magneto has a unique cap that is missing its metal cover and I can't find a replacement online. I may have to resort to making one.

Saturday, July 24, 2021

Yes.... Yet Another Long-Neglected Generator Needing Help. Belco - Bellingham Manufacturing Co.

I've come to realize I regularly need something new to tinker with. My needs are simple and are usually met while perusing the local Craigslist listings for engine-driven contraptions. This latest find seems to be a rather rare item, as the vast Internet has very little information on the company that manufactured my latest acquisition. The manufacturer's name is Belco (Bellingham Manufacturing Co). The tag says the generator is rated at 2 KVA (kilovolt-amperes, i.e. 2 kilowatts), and it is powered by a Wisconsin model AK gasoline engine.

Monday, July 19, 2021

Craftsman 109 Lathe Turning Aluminum

I made a short video of my Craftsman lathe carving up a hunk of aluminum. Below are a couple of still shot of the work being done, then a video at the bottom.

Sunday, July 18, 2021

Craftsman 109 Lathe Dead Centers

I thought I'd try my hand at making one or two dead centers for this Craftsman 109 micro-mini lathe. The headstock spindle and tailstock ram are supposedly a Morse Taper 0 (MT0). I took a lot of time to get the compound set to the right angle, 0.026 inches of taper per side per inch of travel. I got the number from the internet, which the taper for MT0 was .0521 inches of taper per inch (included angle). I then carved out a taper from a piece of 3/8" steel and for whatever reason, the taper was wrong. I fiddled with the compound angle a number of times until I got a finished taper that fit the tailstock ram. I tried that dead center in the headstock spindle but it didn't fit right. Hmm. I then set the compound angle to about 0.020 inches per inch and made another center. That one fit the headstock, and strangely, it fit fairly well in the tailstock too. Hmm again. Maybe I just messed up the first center. In any event, I now have two dead centers for the Craftsman lathe. Don't look too closely at them, as they aren't the best quality. I might try to make one more just to see if it turns out better than the first one I did.

Thursday, July 15, 2021

Craftsman 109 Lathe Tool Post

The cobbled-up tool post I've been using for the lathe is sorely lacking. It's time to bite the bullet and make something. I used this page (link: Deans Tool Post) as inspiration. I didn't bother using measurements from his page but just got out the dial calipers and jotted down some dimensions.

This first photo is of the main body being cut from some scrap steel.

Wednesday, July 14, 2021

Craftsman 109 Lathe Ads 1940s

While rummaging around the vast internet a number of years ago, I ran across a site (christmas.musetechnical.com) that had a large selection of Sears Spring/Summer, Fall/Winter, and Christmas catalogs. Today I was hoping I'd find my little Craftsman 109.20630 lathe in one of their online catalogs so I could get an approximate date of manufacture. I didn't see on their site that the content was copyrighted, so I'm going to post a few images.

I guessed my Craftsman lathe to be about 1940 vintage, but it appears that Sears was selling this lathe under the name Dunlap, not Craftsman, in the early 1940s. The Dunlap lathe was very similar to mine, and I found a catalog advertisement for the Dunlap from 1942, shown below. The Dunlap lathe had a 6 inch swing and 18 inches between centers.

Tuesday, July 13, 2021

Craftsman 109 Lathe Mounting Base

I dug around in the wood pile in the basement and found a piece of 3/4" plywood that I was able to cut a section from to make a base for the lathe and motor. I mounted the motor on a hinge so it was adjustable for the different pulley diameters.

Monday, July 12, 2021

Craftsman 109 Lathe Chuck Backing Plate Fabrication

It was a bit of a bummer that this new-to-me lathe didn't come with a chuck (or motor/tool post/gears), but I happened to remember I had a small 3" chuck (Union Mfg. Co. No. 153 Class S) that had come into my possession almost 40 years ago. So of course a new backing plate is now needed. I rummaged around and came up with two pieces of steel that I could cobble into what I needed. The large donut shaped piece already had a large hole through the center so I just bored it out to clean it up, then turned a smaller piece of round stock to fit the hole. I then cut a short disk of steel from the smaller chunk and welded it to the large donut.

Sunday, July 11, 2021

Craftsman 109 Lathe Cross Slide Handle Repair

This isn't so much a repair but more a fabrication. The cross slide has half of a handle remaining on it. It looks like someone tried drilling a hole to add a handle to the stub, so I just ran with that and completed it. Here's the handle stub that I drilled a better hole in, and the start of a new handle chucked up in the lathe.

Saturday, July 10, 2021

Craftsman (Sears) 109.20630 Metal Lathe Rescue

While at an old tractor/engine show this past Friday, there were also the usual vendors selling just about anything you could think of. My wife and I perused the $1 DVD collection a fellow had and found some videos we liked. He also had an old Craftsman lathe laying forlornly on the ground at the outskirts of his vendor kingdom. I didn't need another project so I didn't even ask a price when I went to pay for the DVDs. My wife then asked me if I'd asked about the lathe. I said no. She then persuaded me to go ask. Big mistake. The guy said he'd take twenty bucks for it. (!) That was even too cheap for me to pass up, so I came home with another project. Friday was a good day to go to the show, if for nothing else but to get the good lathe deal, as it was a pretty quiet day for visitors.

Tuesday, June 15, 2021

Lincoln MKC New 3D-Printed Cargo Net Hook

 It was bound to happen. A plastic hook in the cargo area of our 2015 Lincoln MKC somehow broke. There are two of these hooks that are used to support a cargo net. I looked online and it appears the only way to get a new hook is to get a whole new cargo area side panel. That's not going to happen anytime soon. So... what options do I have? I could glue on a piece of plastic to the the remaining flat part of the hook but it probably wouldn't hold up too well and not look too appealing. The second option is to try and design a new hook and print it out on the 3D printer. The first photo below shows the hook that is not (yet) broken.

Friday, March 26, 2021

GMC S15 Windshield Washer Nozzle Repair

 This squirter nozzle is out of a 1984 GMC S15, and has been broken for many years. While cleaning out the cowl area of needles, I decided to tackle fixing the nozzle, as new ones are not available.

Wednesday, February 3, 2021

Grip Repair

 I have an old pistol from the 1920's that has a small piece missing from the left grip panel. It wouldn't be much of a big deal except for the fact that the small piece that is missing has the job of holding a pin in place that is the pivot point for an internal spring toggle. Here's the beginnings of the repair. I glued a chunk of Mahogany onto the Walnut grip. Maybe not the smartest choice of wood but it was what I had on hand.

Wednesday, January 6, 2021

1880's Tranter Patent Pistol Repair

 I've had this odd pistol floating around for many years, not knowing what it was, as there are no legible markings on it other than a small string of letters and a partial serial number. The rear sight was missing, as was something mounted to the rear of the break-open barrel, but I didn't know what that something might be without seeing a similar gun. So, a few days ago I decided to see if I could find out anything at all from the vast interweb on this jewel.

Monday, November 30, 2020

Pfaff 1212 Sewing Machine Thread Spool Pin Bracket Reconstruction

The Pfaff 1212 I picked up a little over a year ago (link: Pfaff 1212) had an issue with the thread spool pin bracket. The plastic piece that supported the metal spool pins was broken into several pieces. I could have purchased a new bracket for $13 on eBay but decided to try my hand at whittling one from a piece of surplus cutting board plastic. After all, where's the fun in buying something when you can make it? And besides, buying the bracket would have more than doubled the investment I would have in this sewing machine...

Monday, November 23, 2020

Brown & Sharpe No. 21 Machinists Vise

 This Brown & Sharpe vise came with the South Bend 11" lathe (click here) I recently acquired. The vise is more suited to milling machine work but somehow it ended up hitching a ride with the lathe. The saying, "It has seen better days" is an understatement.

Tuesday, October 27, 2020

1929 South Bend 11-Inch Lathe With Quick Change Gearbox

What do we have here in the back of the pickup, a lathe? Yup. Not just any lathe though. This one was acquired by my wife's dad Jon 50 or 60 years ago.

Tuesday, October 13, 2020

1946 John Deere Model LA Tractor Gets New Transmission Bearings - Part 5 of 5

The brake lining material finally came in, so it's time to refurbish the one brake band that had lost most of its lining. The brake "drum" in the final drive had been wearing quite a bit on the metal brake band.

Sunday, October 11, 2020

1946 John Deere Model LA Tractor Gets New Transmission Bearings - Part 4 of 5

With the rear cover plate on the differential, the transmission/differential assembly is ready to reinstall in the tractor and it's time to look at the few other details I need to work on. The first order of business was to free up the brake rods and adjusting yokes that are in the final drives. Well, while trying to free the first yoke with heat and penetrating oil, it snapped the brake rod. I found a bolt that had the same 5/16-24 thread pitch, cut the head off, then ground tapers on the bolt and rod to prepare for welding.


Thursday, October 8, 2020

1946 John Deere Model LA Tractor Gets New Transmission Bearings - Part 2 of 5

This next set of photos shows more of the greasy mess inside the differential. See that green stuff on the left side? That's a glob of grease that was plugging a through-hole between the transmission and differential.

Friday, May 15, 2020

Singer 111W155 Gets A New Servo Motor And Needle Positioner

It's about time. I bit the dust and purchased a servo motor for my industrial Singer 111W155 sewing machine. I had hemmed and hawed for several years whether or not I should buy one. On the one hand I'm old school and like things the way they were built way back when, clutch motor and all. On the other hand, a servo motor would make a much more desirable experience when using the ol' beast. So practicality won out in the end. This photo shows the old clutch motor next to the new servo motor and controller. Now I just need to find space to store the old clutch motor as I won't be getting rid of it.

Wednesday, April 29, 2020

Gas Trimmer Problems

I worked on a friend's gas trimmer today. What I thought would be a short tune-up turned into a five-hour job. Not knowing what issues there might be, I started with the fuel tank on the machine. I pulled off the cap and looked inside. Hmm, that might be the problem:


Tuesday, April 28, 2020

Hydronic Heating System Zone Valve Repair - Micro Switch

Last week I realized a Caleffi  Z-One zone control valve for our main in-floor hot water heat wasn't functioning correctly, so I'd pulled the valve control box off the valve and when I tested its internal micro switch, I found that it wasn't working reliably. The micro switch is responsible for turning on the recirculating pump on the heating system after the zone valve opens. Without the pump coming on, there would be no heated water flowing through the pipes to heat this zone. I ordered a new switch online (takes a week to get it).

Monday, April 27, 2020

Gibson Model D Muffler Relocation

The muffler location, rather, the output direction of the muffler, is not ideal on the Petter AC1Z diesel engine on my Gibson D. Exhaust seems to blow back to the operator (me) fairly regularly. The muffler, as seen in the photo below, is forward of the air cleaner and shoots the exhaust out to the left and back a bit, so some exhaust drifts straight back.