All the parts used in the making of this handle were scraps found in my garage and basement. First order of business was to find a piece of pipe that would fit over the engine camshaft extension. The shaft is 1-1/2" in diameter and I found a small section of pipe that was about 1-9/16" ID, so it slid on the camshaft extension easily and without binding. I chucked up the pipe in the Sheldon lathe to even out the crooked end cut.
I then found a piece of rod and tubing to make a catch pawl and guide tube.
The rod was a hair too large to fit into the tube, so I skimmed off 1/16 of an inch.
Perfect fit.
I then cut a piece from the rod to make the catch pawl. It has a notch cut into one side to engage the keyway on the camshaft extension, and a ramp on the backside of the notch, so when the engine starts, the backside of the keyway in the camshaft extension will push the pawl away from the keyway to disengage the handle from the shaft.
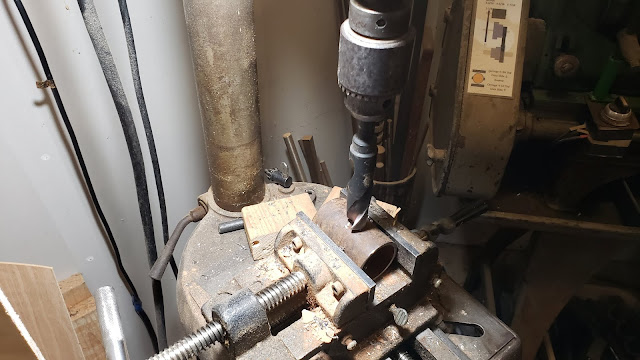
These next few photos show a 3/4" hole being drilled into the crank sleeve that fits over the camshaft extension. I was able to slow the drill press down to 214 RPM for the large drill bit using the multi-speed attachment on my old Craftsman 150 drill press. Normally drill presses don't have the ability to go slow enough for large drill bits.
Here are the parts ready to be welded together. The pawl won't be welded to anything.
Voila. At this point I tried out the new handle on the generator and it worked like a charm. The engine has a compression release lever for each cylinder so that you can get the engine spinning fairly easily before throwing the release levers off. I was surprised how easily the engine started.
It was a bit difficult to get the pawl in the right orientation, so I then made further changes to the starting handle. In the below photo I am putting 10-24 threads onto a 3/16" rod to act as a small handle/guide on the pawl. I used the lathe to keep the threading die square with the rod.
I tried to drill a hole into the pawl for the small handle I'd just made but the steel was too hard. I annealed the pawl in hopes it would be easier to drill.
And it worked. Shown below is the finished pawl with a threaded hole, and the guide tube for the pawl with a slot cut into it.
I then decided to also make a wood handle. I started with a piece of 1-1/2" square Fir.
I don't have a wood lathe so I pressed my ~105-year-old Seneca Falls metal lathe into service.
Not too bad, if I do say so myself.
I then coated the wood handle with Danish Oil Finish.
I gotta show just one more photo of the finished product. You can see the small alignment rod poking out the slot in the guide tube. I sprayed the steel parts of the handle with Hammerite-type paint I had on the shelf.
Below is a stock photo of the handles for sale on the internet. They look to be made overseas and the handle arm looks quite a bit shorter, which would make for more difficult starting of a 3-cylinder engine. Maybe they're designed for the single cylinder models.
Update, the following is a video of the generator being started by the new handle:
Second update, the following is a video of another cold start, then load-test:


No comments:
Post a Comment