The B "Orchard" tractor came from the factory with small shields for the air intake and the two fuel caps on the hood, so low-hanging tree branches had less of an opportunity to snag on stuff. My tractor's hood had the air intake shield but the two fuel cap shields were not on the hood, which doesn't make much sense, as the BO hood always had all three shields and the BR hood always had none. Fortunately two proper shields came with the tractor.
Today would be the day I either ruin the hood or come away with a finished product that looks somewhat decent. This first photo below shows the shields. They look like small air inlet scoops but the openings will be facing rearward. The openings are a little dented up so the first job is to try and straighten them.
The straightening went fairly well.
This next photo below shows the hood with two conspicuously absent shields.
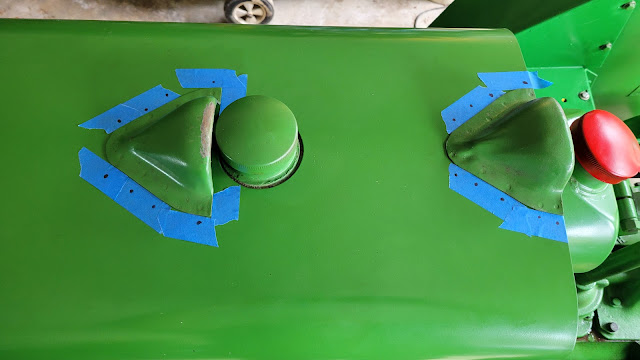
These next two photos show a mock-up of the shields.
Blue tape is my friend. The black dots are where the original spot welds are on the shields, and I'll try and drill holes so the MIG welds line up with the spot welds. Apparently these shields were on a hood at one time.
The next step was to remove the hood so I could do drilling and welding on the hood. I decided to put a quick layer of paint on the fuel tank.
This next photo below shows better where the holes will be drilled. I put the black dots on the tape the same distance away from the edge of the tape as the welds on the shields were. That sentence probably doesn't make sense...
I have come to the point of no return. Eight holes are drilled in the nice hood. No turning back now. This is stressful...
Ok, so I drilled the holes too small in the hood. I tried welding through four of the small holes but the scoop didn't stay put, so I had to grind the four welds down and re-drill the holes larger.
This next photo below shows the first shield welded on. It's not purty at this point but hopefully paint will cover a multitude of sins.
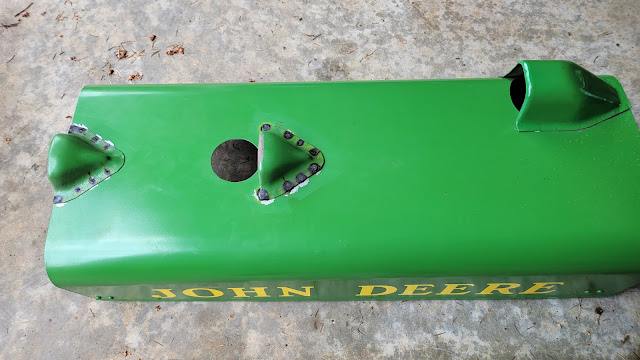
The second shield is welded on and the photo below shows the welds before grinding them flat. They have to be ground flat because the fuel tank contacts the bottom surface of the hood. If I left the weld lumps, they would wear through the tank.
The welds are ground down now.
I put a coat of paint on the underside of the hood.
The next photo below shows the shields sanded and ready for paint.
The finished product. I don't know why but the paint on the hood is not real glossy, so the paint I just put on the shields stands out quite well, unfortunately. Maybe someday I'll paint the whole hood, but then I'll have to get new decals. Of course, if I did get new decals, I could try and get this left side one on straighter than the previous person did.
Ok, here's the real finished product.
It's several days later than the day I took photo above and the different colors and sheens of the new/old paint were bugging me, so I took some 1,000 grit sandpaper to the top of the hood to try and get both paints the same sheen. It made the hood really smooth but didn't really look all that good, so I taped off the top of the hood (to protect the sides and decals) and used up the remainder of the old can of spray paint I'd gotten at a garage sale. I had just enough to get a couple coats of paint on the hood before running out. It is a lot better looking now though. The next two photos are of the finished hood.


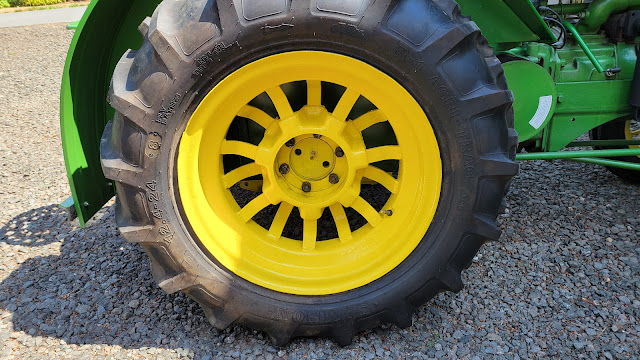
I then went to the basement because I thought I had an old can of yellow paint I'd brought home from my father in law's basement in the mid 1980s. I did find it and, yes, it does look like it's 50 years old, DeRusto brand. I got it open and peeled the top hard layer of dried paint and stirred up the thick stuff in the can. It was almost a perfect match of yellow, so I touched up the rear wheels. These next two photos are the before and after photos of the left side wheel. It isn't in too bad of shape.
These next two photos are of the right wheel. It was worse and had a lot of scaly bubbles and pits so I wire brushed it, then painted it. I ended up painting the entire wheel since it was so bad. These are also before and after photos.


No comments:
Post a Comment