A guy in my tractor club owns this 1925 Economy 1-3/4 hp hit & miss engine. It hasn't run right for a couple years now and at the recent county fair, we started smelling gas, and I speculated it might have a tank leak. I offered to take a look at the engine, brought it home after the fair and sure enough, the soldered outlet on the gas tank had failed. I pulled the tank and re-soldered the joint. Of course, to get the tank out, the wheels and wooden base had to come off. That meant enlisting the help of the engine hoist, as the engine is probably in the 300+ pound range.
The gas tank is suspended up under the base of the engine with wire. There are four cast-in lugs poking out of the casting above the tank, and when re-installing the tank, it's a trick getting the wire onto the lugs with the tank covering them up.

In the photo below, the hex-shaped fitting is supposed to be soldered onto the tank. When I tried taking the pipe out, the hex fitting spun freely.
This photo below is the joint soldered up. I used a 260 watt soldering gun. I had to let the heat of the gun soak in quite a bit before the solder started flowing well, but patience prevailed and the fitting seems to be bonded to the tank again.
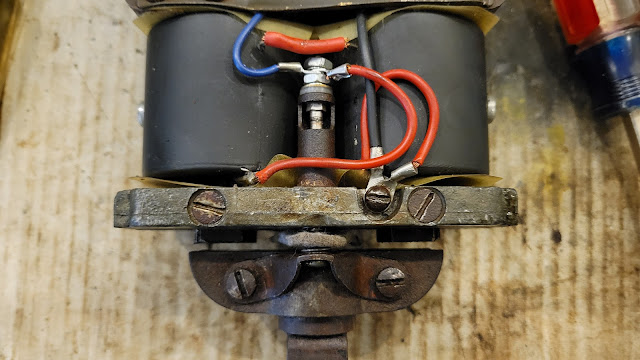
Once the tank was fixed, it was determined that the fuel issue wasn't the only problem this engine had. I then delved into the Wico model EK magneto, as it didn't seem to have a very strong spark. The point gap looked a little wide so I did some research online and found that for the Type II trip mechanism this engine has, the points should be set at 3/32". The first photo below shows the points closed and no gap between the magnet poles and the armature. The next photo shows the armature gap with the points just at the point of opening and a gap between the magnet poles and armature. I didn't measure the gap but it was probably 1/8". I set the points to spec but that also didn't help the engine situation much.
Next I found that the ground spring on the magneto case was loose, so I took a hammer and drift and got the rivet tight again. That also didn't solve the problem. So many little things needing tweaking but none of them was the cure.

At that point I turned to the spark plug, since the plug wasn't sparking every time the magneto tripped. It has a 1/2" pipe thread, which I found none of the local parts stores carried, so I ordered one. I suspect the plug is getting fouled. While waiting I figured I could easily make an adapter so I could use a readily available (as in on my bench) M18 x 1.5 mm spark plug. I made the adapter from a 1/2" NPT old brass reducer bushing and just needed to cut new internal threads on the lathe. The threads were metric and I didn't want to switch the lathe change gears out for metric threading so I just used the closest Standard pitch, which was 18 threads per inch. Metric 1.5 mm is .059" pitch (distance from one thread to the next) and Standard 18TPI is .056" pitch, so only .003" difference. The M18x1.5 spark plug threaded in most of the way by hand and went all the way in easily with a wrench.
That 18mm spark plug worked for a while but then the engine died again after several minutes of run time. It was then that I did more thinking about the gas pickup pipe in the tank. If you look at the top few photos above, you can see the bottom of the fitting sits maybe 3/8" above the bottom of the tank. The pipe is also close to 1/2" in diameter, so the tank has to have almost an inch of gas in it to completely cover the outlet pipe, otherwise the engine will be sucking air into the air mixture valve.
After all that messing around, filling the tank more, and putting in the new spark plug, the engine ran for 35 minutes before I decided to shut it down. I still think the magneto is a little weak, so the plug will probably foul easily. I'll have to tell the owner to keep spare plugs on hand if he's wanting to run this engine for any length of time.
The next job was on a 1939 Turner Hay Press owned by a local branch of the Early Days Gas Engine & Tractor Association (EDGE&TA).
One tensioner handle/nut was missing on the press when the club acquired it and they just had a plain nut in its place. I brought home the nut and the original handle and nut so I could make a suitable handle that came close to matching the original.
The first order of business was to find a piece of steel in my small stash of steel stock. Hmm, let's see, anything in there that might work?....... Oh, wait, is that what I need right there?
Yes, that piece there.
The piece of steel was the exact length, width and thickness I needed.
It just needed a little trimming on one end, then grinding to make it round.
These next two photos below show the nut welded to the bar. Don't look too close at the welds. A welder I am not.
I can spray a mean coat of spray paint though. This hay press (and I) will be at the Kittitas Valley Early Iron Club Threshing event the middle of this month. We'll see how well the new handle works.


No comments:
Post a Comment