I'm not sure I can call this a real lathe but it was marketed as one. And it does make chips. Very small chips. Someone online said, "it makes steel wool." I now know what they mean. But this lathe wasn't bought to make stuff on a regular basis. I mainly got it because it is so cute and comes in its own little box.
The above photo was how I received the lathe. It is fairly complete, which is a bonus for something that is at least 50 years old (probably closer to 60).
A previous owner appeared to have used this thing as a wood lathe, as there is a bunch of sawdust, er, lathe-dust, covering it. The seller who I dealt with was the daughter of the guy who used the lathe. She didn't know anything about it other than it had been her dad's and she didn't want to store it any longer.
Below is a photo of the stuff that came with it, courtesy of the seller's ad. There is an original three-jaw chuck, a face plate, tool post, handle for drill press work, two dead centers (one is on the machine), and a bunch of tool bits. The brass thingy looks like a condenser for an old engine magneto, so it doesn't belong. Not in the photo is a drill chuck and a mill stand (see above photo).
Here's the box, showing a bit of wear.
Here's a photo of the tag on the lathe. I think both tags are the same part. They look the same size.
This next photo shows the lathe in the mill/drill press orientation. The motor and spindle assembly is unbolted from the base, then the mill post is installed in the base and the motor/spindle is bolted to the mounting pad on the post.
One downside to this particular lathe is the motor bracket. It is home-made from a piece of flame-cut steel plate. Apparently the original aluminum/ZAMAK bracket broke sometime in the distant past.
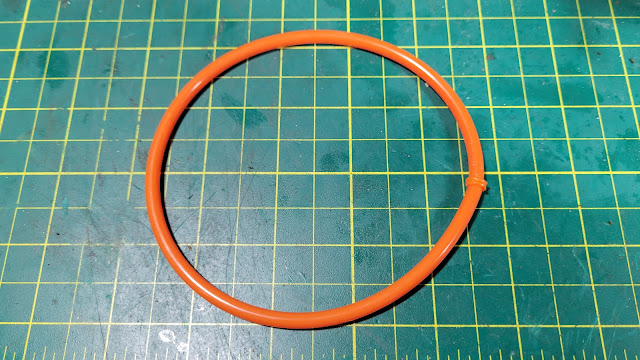
I used a flat blade on my soldering gun to melt the ends of the belting, then stuck the melted ends together. It worked very well. I was a bit concerned about this process, as some people online couldn't get the ends to stick, but I didn't have any issues. I used a utility knife razor blade to trim the excess bulge at the joint.
The lathe needs two belts, and here they are. I have a lifetime supply of belting material too, as it came in a 10-foot length. It was something like $13 on Amazon, and the description said Made in USA, so let's hope it holds up.
My first attempt (below) at making chips was on some brass. It worked ok but the finish wasn't the best. It was sometime after that I realized the spindle bearing on the left end of the spindle was put together incorrectly. When someone in the distant past put the spindle parts together, they didn't get the inner race put back onto the bearing and it was sitting outside and to the left of the bearing. When I first saw the inner race, I thought to myself that it looked like an inner bearing race but since I didn't know much at all about this lathe, I figured it was a spacer. I later realized the issue and got things put together correctly.
In the photo below, there are two two items (file and hex key) that I was using to tighten the chuck (the official term is "Tommy bars"), but they didn't work all that well. As you can see, they got bent. I made a couple bars from some 3/16-inch rod (.1875-inch). The holes in the chuck are 5/32-inch (.156) but I turned the ends down to about .160, as the chuck holes are a bit wallowed out. I might make some better bars in the future (see further below) but these will work for now.
This next photo is of a piece of mild steel after being turned down and faced. Notice the steel wool chips...
Aluminum was next. This machine was made for turning aluminum. The chips came off easily and a shiny finish was left.
Below is the belt setup I used. The belts look loose but they didn't slip at all. According to the manual I found online, this arrangement should be 850 RPM (number 3 in the chart below).
The plywood top of the box had some water warpage, so I glued it up.
Everything fits neatly into the box. The small box is something I found at a thrift store for $3 and I'm using it to contain all the small bits instead of the zip lock bag that the previous owner used.
Below are the three metal samples I used for testing. The brass piece was refinished after the spindle bearing fiasco, so it now looks much better.
The motor on this lathe is 95 watts, which is right in the range of your standard 1960's era Singer/Kenmore/Pfaff sewing machine. Small wonder the company was able to market a lathe with such a small motor.


No comments:
Post a Comment