I worked on a friend's gas trimmer today. What I thought would be a short tune-up turned into a five-hour job. Not knowing what issues there might be, I started with the fuel tank on the machine. I pulled off the cap and looked inside. Hmm, that might be the problem:
Seeing all the junk in the tank, I figured this would be an even faster repair job, as I could just flush the tank out and get the thing going. I dumped out the gas and found that 80 percent of it was water. Most of what is in the photo below is water, with a thin layer of gasoline floating on top.
I then pulled the filter out. It was gummed up with stuff too.
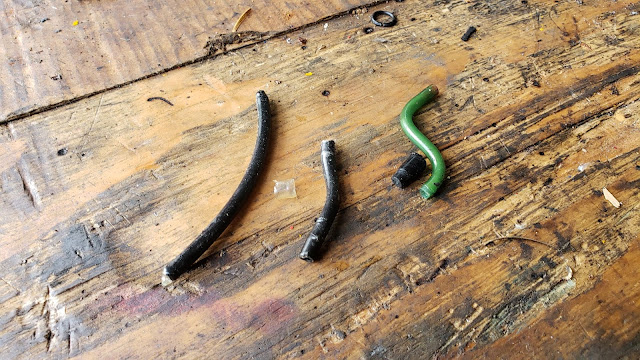
In the process of pulling out the fuel filter, the gas line came apart and I could tell it was swollen shut. Maybe that's why the primer bulb wouldn't suck any gas out of the tank.
Fortunately I happened to have some spare gas line from fixing my gas trimmer a couple years ago. After a new fuel line was installed, I threw in some gas and tried to start it. No fire. Hmm, what next? I pulled the carburetor off and cleaned it out. Cleaning involved cutting slots in the idle and main needles to get them out, as they were basically a round post with a small flat on one side and no way to turn them. I used a Dremel tool and cutoff wheel to cut screwdriver slots. The below photo shows the two needles with slots (red circle). Unfortunately it's a little blurry.
Once the carburetor was back on the motor, still no fire. Hmm, what next? I had spark, gas and air. The motor should have run. I tried starting fluid, poured gas into the carb, nothing worked. The owner had brought along a new spark plug but it was the wrong size. It looked like the threads might be right so I opened the bubble package and installed the new spark plug, even though the old plug was producing spark.
And now with the new spark plug in place, the plug wire was a teensy bit too short (or more accurately, the plug was too long) but I'd been able to barely get the wire on the spark plug. Still no fire. And when I tried getting the wire back off the plug to check its condition, the end terminal inside the spark plug boot came off the wire. *sigh*
Reinstalling the terminal would be an easy fix, but having enough wire length to work with was the issue. After removing about 10 screws, I got the outer housings removed and was able to finesse the plug wire out far enough to fix that problem. But in the process, the return gas line broke. Another *sigh* moment... I guess I should have known that tube was as old and brittle as the gas line. Fortunately the spare gas line kit in the shed happened to have some of the right tubing for that job too.
The photo below is the level of disassembly I had to do to get to the plug wire.
In the above photo, the crankshaft and connecting rod can be seen in the round hole to the left of the finned cylinder barrel. The crankcase cover over this hole had a loose screw that I only found because I had to take off the shroud around the engine to fix the plug wire.
That loose screw was the main culprit for this trimmer not running. The crankcase cover with the loose screw was letting air into the engine, causing a too-lean condition. If I didn't need to fix the spark plug wire that popped apart because the new plug was a little too long, I probably wouldn't have found the loose screw, and this trimmer would probably be in the trash can by now. The big man upstairs was looking down on this ol' soul.
Alas, the trimmer is all back together and running!


2 comments:
Very Clever investigations!!! Good result, imagine you are very happy with that one!
Yep! I was getting pretty discouraged there for a while.
Post a Comment