Monday, July 22, 2024

1936 John Deere BO Radiator Curtain Fabrication

The very early model B tractors came with a canvas curtain on the front of the radiator to regulate airflow through the radiator. The main reason for this is because the cooling system didn't have a thermostat common to all internal combustion engines these days. This BO's engine is called "All-Fuel", and it runs on both gasoline and distillate (i.e., kerosene). You'd start the cold engine on gas from a small tank behind the main fuel tank, then when it was warmed up, you'd switch to distillate, which was a cheaper alternative to gasoline back then. Distillate needed a hot engine to burn well, and the curtain was the solution at the time. In order to get the engine to operating temperature quickly, the curtain would be pulled down over the radiator so the engine coolant would warm up quickly. There was then a roller at the top of the curtain to crank up the curtain to regulate coolant temperature. Later model John Deeres used steel shutters that were controlled by a rod back by the operator (then even later by thermostat), making it so the person didn't have to dismount the tractor to adjust the airflow. I don't know when shutters were discontinued but I'd guess sometime in the late 1950s, when they went to more conventional means of temperature control.

Today's project is to make a radiator curtain. My tractor fortunately came with most of the hardware. My previous 1937 BO didn't have this hardware. The main components for the curtain are a radiator guard (the mesh screen), upper curtain roller, lower curtain clips and spring, and guard spacers. I don't have the spacers so will need to make them, but they are just a standoff to hold the radiator guard 1/4" away from the radiator. Below are the components.

Friday, July 19, 2024

1941 John Deere Model LA - New Acquisition

It's been how long since I bought a tractor? Six days? Yup. And I just bought another one? Yup. But there were extenuating circumstances. Really, I'm not kidding. I got in touch with the previous owner of the 1936 BO tractor I'd just bought last week to line up a time to pick up a few spare parts he had. He said to come on over. I did, and after he showed me the parts, I asked if I could see his other tractors. He's got only John Deeres, a 1940s AR, a 1941 LA, and a 1936 B. He said he really needed to get rid of the LA, and he said these grave words, "It would make a great parts tractor for someone." Huh? Parts tractor? It's way too nice to be a parts tractor. So I asked what he wanted for it. Five hundred bucks. Huh?.... I'll take it! So I went home, hooked up the trailer, and went back to pick it up.... before he changed his mind.

Monday, July 15, 2024

1936 John Deere Model BO First Repairs

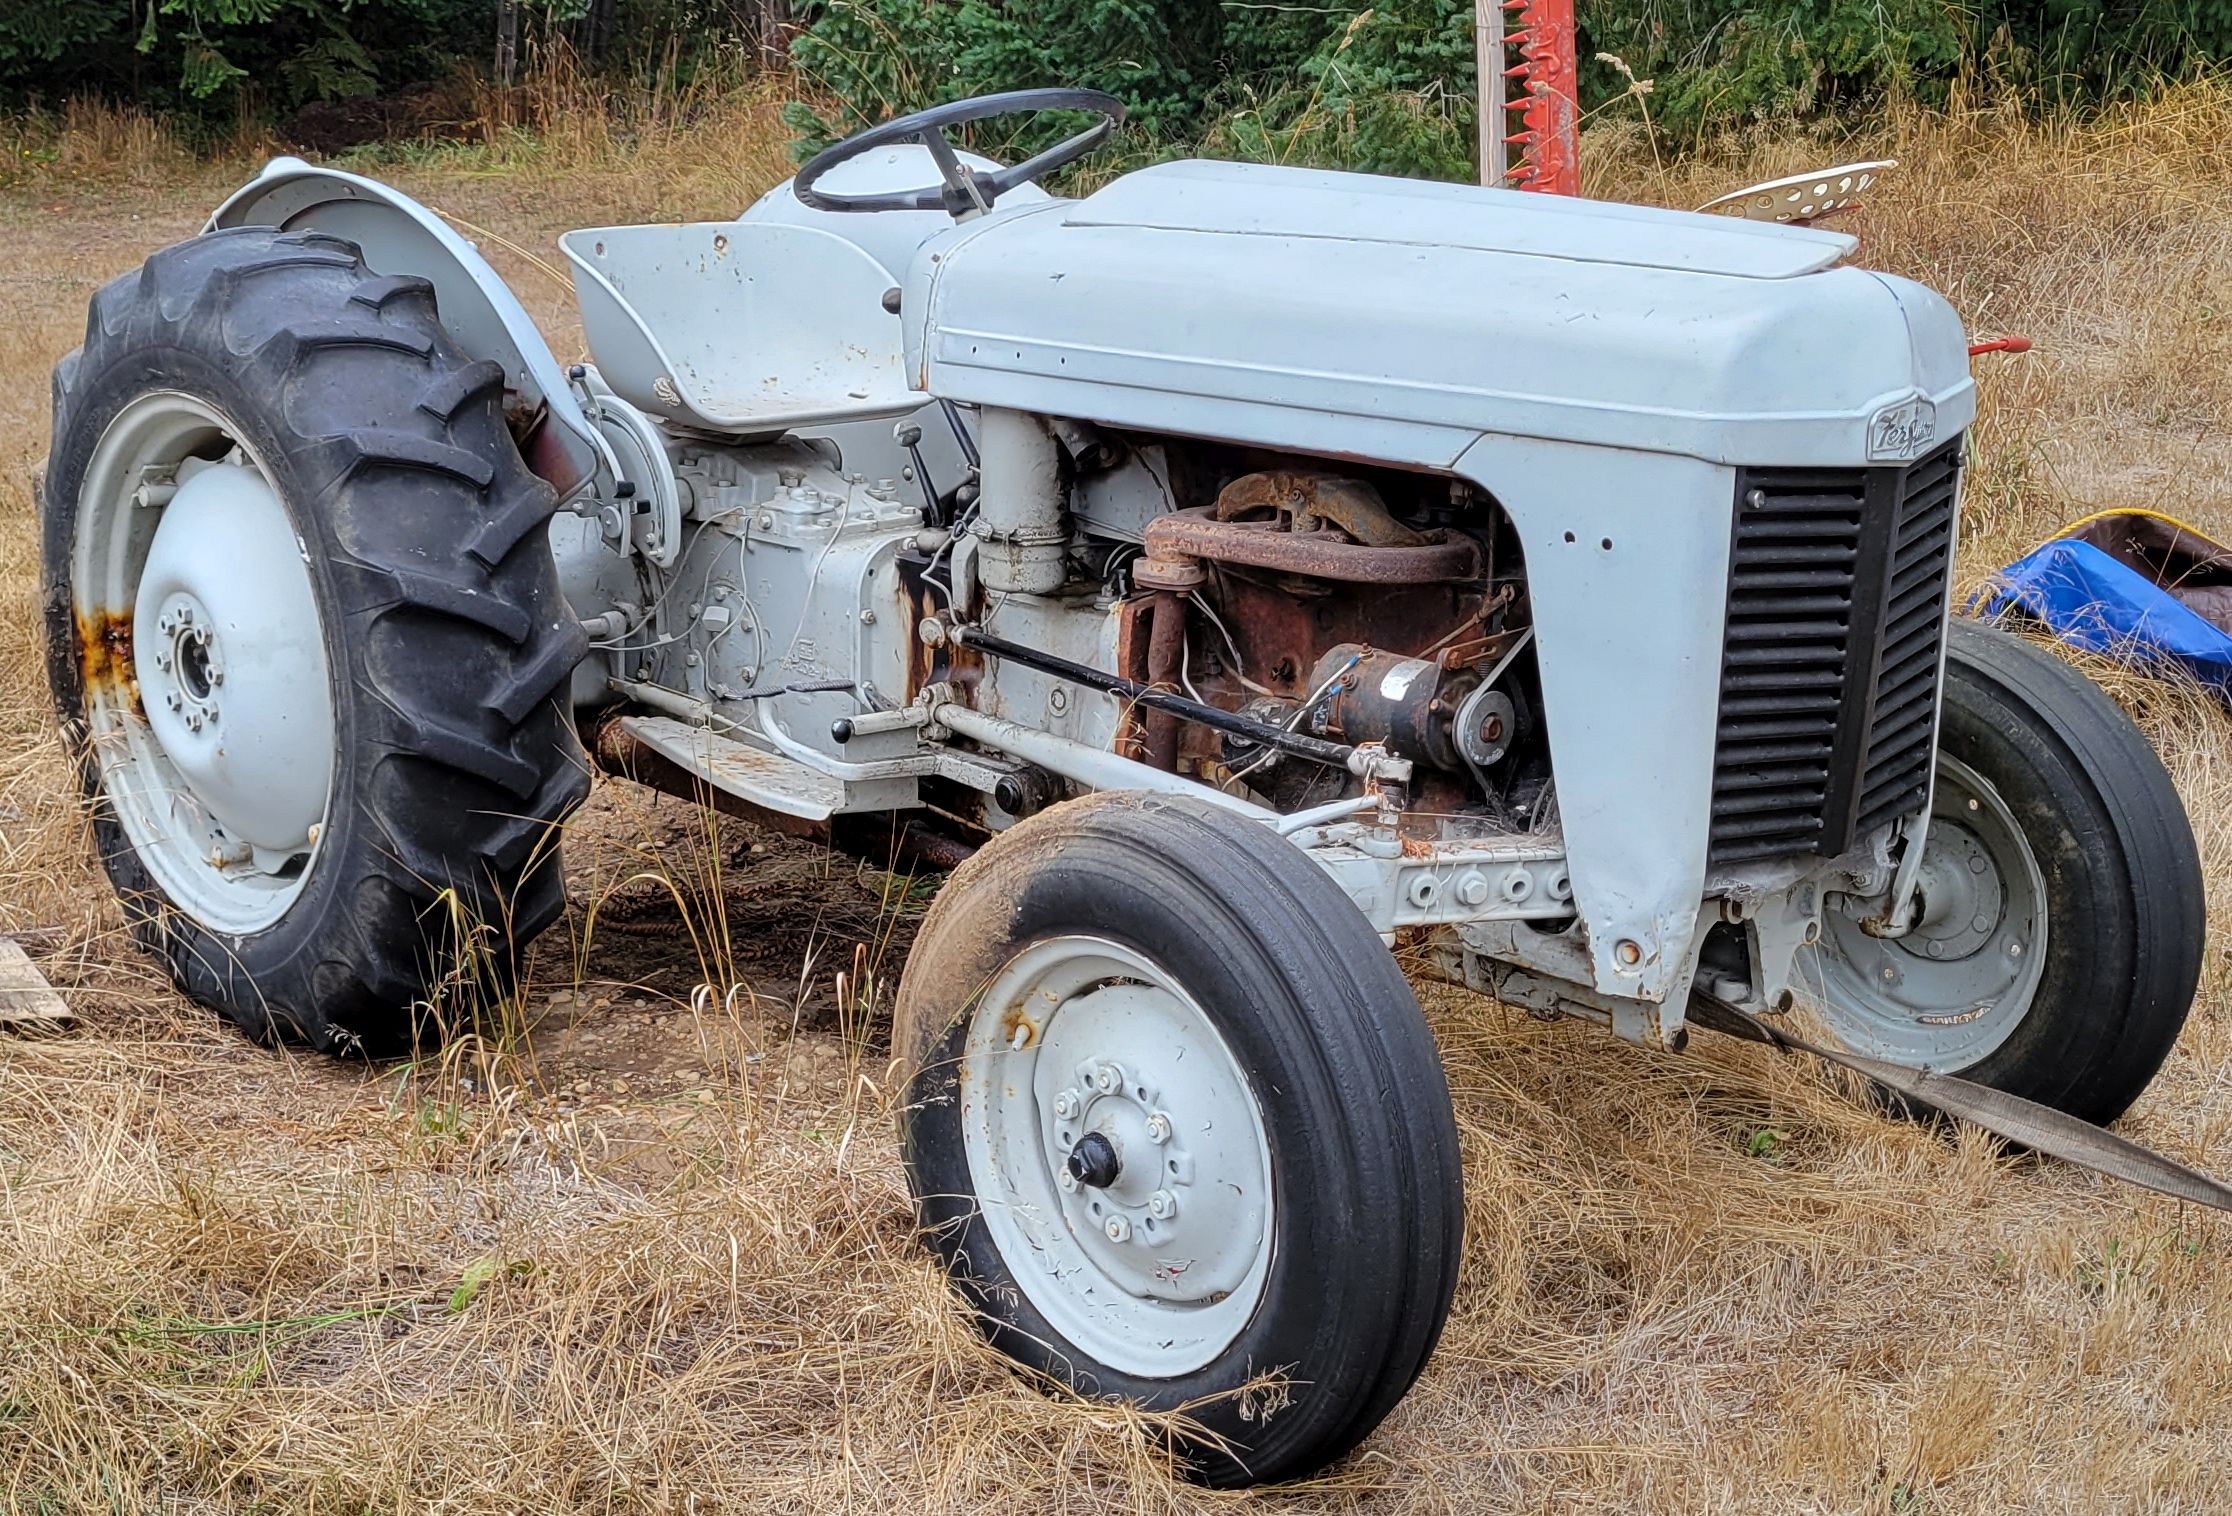
It never seems to take long for me to do some fiddling on a new-to-me tractor, even though I'm in the middle of fixing the hood on my Ferguson TO-35. That project has just got to wait, since I have a new favorite toy to play with.

Today's first job was to fix the clutch rod. Someone in the distant past thought it was a good idea to weld an iron pipe nipple onto the rod, I presume for strength. One big problem was that in doing so, they made the rod un-adjustable for length. They also welded the pipe to the cast steel clevis on the end of the rod. That's also not good. My job was to fix the mess... Oh yeah, and straighten the rod.

Friday, July 12, 2024

1936 John Deere Model BO - New Acquisition

By now I should know not to go to tractor shows. They're dangerous. Yes, I bought yet another tractor today (7/12/2024). But it was a good deal. The gentleman I bought the tractor from was a co-worker of mine from way back in the 80s and 90s. I'd bought a 1950 John Deere BN with a front loader from him around 1994. That tractor is long gone but in the last few years I'd reconnected with the gent through a local tractor club I'd joined several years ago. Recently he had been making comments occasionally that he wanted to sell this tractor and I took note.

Well, today was a tractor show and I noticed he had the tractor at the show when I got there. It had died shortly after he got it off the trailer at the show and it didn't want to start again (a couple experts were trying to get it going). I jokingly asked what the broken-down tractor was going for today. He said, "$2,500 show special." Later he threw out some other numbers. Sometime in the afternoon I told him I'd like to buy his tractor, and he seemed surprised that I was actually interested. So the deal was made (for less than the "show special" price). I came back home and picked up my trailer, then drove back to get the tractor. I put 180 miles on my truck in the four trips down and back from the show. Here's the first photo. Isn't it cute?

Saturday, July 6, 2024

Sleep Number Bed FlexFit Smart Mattress Top Magnetic Cover Repair

Anyone who has one of these Sleep Number FlexFit Smart adjustable beds probably knows what this posting is about. The mattress cover has magnetic pucks that correspond to steel pucks fastened to the bed base. Since the base is adjustable, the mattress needs to somehow "adhere" to the base so it doesn't just slide around, so Sleep Number used these strong magnets embedded in the mattress cover to attach to the base pucks. Problem is, the mattress cover that the magnetic pucks are attached to is very flimsy, and over time the magnets pull out of the cover and leave gaping holes. I found multiple postings online of other folks having the same issue, and their recourse was to pay Sleep Number between $250 and $1000 to fix it. Sleep Number does not warranty this issue (shocking) and I'm cheap (also shocking), so I decided to try and fix the thing myself rather than buy a new mattress cover. Below is a photo of one of the blow-outs.

Thursday, July 4, 2024

1965 International 140 Headlight "Fix"

I put quotes around the word "fix" because it's not really something that is broken, but is more of a visual enhancement on the tractor. You see, when International Harvester came up with the goofy Model 1000 one-arm loader, they had to come up with a way to move the right front headlight out of the way of the loader lift cylinder and arm. They made a nifty bracket that moved the headlight in and up. Problem is, they only moved the right headlight, so the left headlight sits lower than the right one and it makes the tractor look even goofier than it normally does with its offset engine and one-arm loader. I think now would be an appropriate time to use the word cockeyed...

Tuesday, May 7, 2024

1949 Ferguson TO-20 Generator and Regulator Repair

I figured it was time I looked into the charging system on the tractor. It had a dead 6 volt battery in the compartment when I bought it so I was pretty certain the electrical system wasn't too far out of order. I pulled the generator and regulator off the tractor and took them to the bench. The generator didn't look too terribly bad in where the three brushes reside, but two of the three brush holders were stuck. A little oil freed them up. This first photo below shows the side with one brush. It's pretty clean in there.

Saturday, May 4, 2024

1949 Ferguson TO-20 First Wash in Decades

Ok, so it wasn't really a "wash". I used a pressure washer. The tractor is still wet in the 'after' photos but it did make quite a difference...

Thursday, April 18, 2024

2015 Lincoln MKC Front Wheel Bearing Replacement

This isn't something I usually write about but in this particular instance I would like to get down in words the supposedly simple task of replacing a front wheel bearing that went south in a spectacular way. Over the past several weeks/months I've noticed a noise coming from the front of the Lincoln that has every indication of worn front wheel bearings. Ok, now it's time to see how much of a job this is, so I visit YouTube to see how everyone does it. They make it look so easy. Off to the Jungle website to find replacement bearings and a nifty bearing puller/installer setup so I can do the job on the car. Mistake number one, don't buy wheel bearings from Amazon, but more on that later.

I started on the driver's side, no particular reason why. After removing the wheel/tire, the first order of business is to remove the brake caliper and hang it up and out of the way. Next is the axle nut. It's tight. Very tight. A pipe on a couple wheel studs and a 24" breaker bar on the nut is what it took to remove it. The rotor can also come off now, along with the dust shield on the back side of the rotor.

Monday, March 18, 2024

1985 Cushman Truckster New Brake Master Cylinder

I bought this Cushman May of 2022 and it has had a brake master cylinder leak for who-knows-how-long, certainly years before I got it. I figured it was time to fix it. Needing to move the beast to the garage, the engine did not want to start. I cleaned the points. I checked the spark at a plug wire. I made sure the fuel pump was pumping. I cleaned the points again. I bypassed the coil resistor. I checked for voltage to the coils. I put in more gas. I checked the points again, and yep, still a spark. Then out of the blue, the thing started up. Who knows what the problem was. But during that time of troubleshooting, I had to push the Cush out of its hole in the shed, and in doing so, I noticed one of the dump bed hinges seemed a bit off. Ok, add that to the list of things to do today. Once I got the engine running, I drove to the front of the garage and lifted the dump bed. Yep, that is a broken hinge.

Thursday, February 22, 2024

Starting Work on the "Lawn Ornament" 1949 Ferguson TO-20 and First Start

With the 1958 Ferguson TO-35 back together, running, and moved out of the garage, there was a big hole just waiting to be filled, so I pulled the TO-20 lawn ornament in to begin the task of getting it running after who-knows-how-many-years of sitting neglectedly (is that a word?). Well actually I didn't pull the tractor in, my wife and I pushed it into the garage, as, you know, it doesn't run.

Tuesday, December 26, 2023

Epos Triple Date Moon Phase Chronograph, Valjoux 7751 Movement, Minor Adjustment

I don't do much tinkering with watches anymore since I have Familial (or Essential) Tremor. As the name implies, it causes shaky hands and is passed down from parent to child. Lucky me. Anyway, this Epos watch was bought in 1999 (for a whopping sum at the time of $697) after we'd paid off our house loan. It was a time to celebrate and my wife and I each decided to splurge on something nice. This is what I chose to buy. It had been having minute-counter issues for a number of years. When the chronograph was started, the central seconds hand would go round-and-round as it should but the minute counter would haphazardly either count or not count up the minutes (and since the hour counter was tied to the minute counter, its movement was also intermittent).

I didn't wear the watch much lately because I'd gotten other nicer watches over the years but I pulled the Epos out a few days ago to wear it. That's when I decided to try and fix the problem. It is not a small task to delve into an automatic chronograph movement, and it is compounded immensely by both shaky hands and the fact that this chronograph is additionally complicated with a 24-hour pointer, triple-date (day/date/month) functions and moon phase. I'd watched several videos on YouTube prior to taking the plunge, so I figured I knew pretty much what the problem was and how deep into the watch's bowels I had to go.

Monday, December 18, 2023

Old Barracuda's Old Wiring Woes

I hopped in the '66 Barracuda Formula S at church one night in the dark after instrument practice and something strange happened. I turned on the headlights and very soon after I started driving, the dash lights went out and the under-dash "map" light came on. As an added bonus, the two C-pillar dome lights no longer worked, as I'd found out since I was fiddling with the headlight dimmer switch to try and get the map light to go off. Get this, all three map/dome lights are controlled by the headlight switch - it makes no sense why one light would be on steady and the other two won't turn on. I figured it wasn't a big deal to drive home with no dash lights, and they did actually come on (and the map light went out) about halfway home.

Everything's fine, right? Apparently not. When I got home my brother texted me and said he saw no taillights or brake lights when I drove away from church. Hmm. Well at least they probably came back on when the lights "fixed" themselves on the way home. So, today I started digging into the 58-year-old dash wiring (the car was built November 1965). I wasn't sure what would cause this issue, so I started at the headlight switch. The easiest way to get to it was to pull the instrument cluster. It's not a terrible job but it isn't trivial. The steering column also had to be lowered to get the dash out.

Sunday, November 26, 2023

,,, And Then There Were Nine ...

It happened sooner than I expected. In fact, I hadn't expected this to happen at all. I brought home another tractor. And this one is a real doozie. It's a 1949 Ferguson TO-20. Rather than try to explain what I bought, here's a photo from the seller's ad on Craigslist. I know, it's a real peach.

Monday, October 30, 2023

1965 International 140 Industrial Tractor First Repairs

10/30/2023
As good as this tractor looks and runs, it still needs repairs right off the bat. Two issues that I found today are a non-operational hour meter and a broken seat track. The hour meter comes first.

Sunday, October 29, 2023

1965 International 140 Industrial Tractor with a Model 1000 One-Arm Loader

How many days has it been since I lamented over buying yet another tractor? Um, thirty-three. Yep, I bought another tractor yesterday. Uh-huh. But I couldn't pass up this one. It was just too quirky. Here, have a look for yourself.

Saturday, September 30, 2023

1951 Baird Beaver - New Front Tires and Implement Lift Repair

The front tires on this tractor are in sad shape. Holes in the sidewalls kept me from pumping them up very much. I ordered two new tri-rib tires off the net and today is the day to install them. With the wheels being a two piece design. I thought it would be a simple matter of removing the bolts, splitting the halves, and getting the new tires on. Nope. Firstly, the bolts fought me the whole way. One problem is, the head side of the bolts (screws?) have a slot for a screwdriver, so I couldn't use a wrench on that side. Secondly, the nuts were so tight on the threads that even with a vice-grip clamped to the screw heads I barely got the nuts off with an impact driver (I actually broke an adapter too). Once the bolts were removed and the old tires were off, I noticed both wheels had rust holes. Bummer.

Monday, September 18, 2023

1955 Ferguson TO-35 Hydraulic Pump Installation and Other Maintenance

I didn't end up disassembling the hydraulic pump like I'd planned. It didn't really seem to need it after looking things over. I cleaned up the outside, made sure the control valve was free, installed a new relief valve, then slapped it back in the tractor. Prior to doing that though, I got sick and didn't feel like doing much of anything. I did manage to install a choke knob.....

Sunday, September 10, 2023

1951 Baird Beaver Garden Tractor

Joining a tractor club has its benefits. It also has a downside. Namely, tractor club members usually have excess tractors taking up space at their residences. To that end, I bought two tractors in two consecutive days, from two tractor club members. I've posted about the Ferguson TO-35 but not about my new 1951 Baird Beaver. Just look at this cute little thing. The funky piece of steel poking out the front of the tractor is for a blade, which unfortunately didn't come with the tractor.

Saturday, September 9, 2023

1955 Ferguson TO-35 Hydraulic Pump Removal

Ok, it's not as bad as you might think. It took me less than two hours from start to finish. Rachel Gingell on Youtube has a video about taking the pump out of a Ferguson 35, and that is what I basically followed. This first photo is of the fairly unmolested tractor before its guts were yanked out...

Tuesday, September 5, 2023

1955 Ferguson TO-35 Comes To Life

Yes, the new tractor project lives. In the last entry I mentioned that the carburetor was not installed when I purchased the tractor. Not knowing its condition, I proceeded to take it apart. It was clean inside but some bits were not tight, so I just put the thing back together and tightened up anything that was loose, then installed it on the tractor. I didn't feel comfortable putting gas in the tank yet since it hadn't been cleaned, so I just squirted some gas into the carb inlet, hooked up a battery, and let 'er rip. Here's a video of the process:

Monday, September 4, 2023

Wednesday, August 16, 2023

Rummage Sale Finds - Three Multimeters, Triplett and Fluke

I ran across a church rummage sale a few days ago down in the Portland, OR area and spotted some old multimeters in the sea of stuff. A Triplett and two Flukes. I figured they wouldn't work but decided to get them anyway, just because they looked cool. This first photo is of the Triplett, a model 630-NA Type 4.

Tuesday, August 15, 2023

Dad's 1940's Stanley Bailey Type 17 No. 5 Hand Plane

I'm working on a slab of Maple for a project and I needed to plane some raised parts down. I grabbed my small Stanley plane that I got at a garage sale eons ago and went to town. Hmm, the cutting blade wouldn't adjust very well and chips weren't coming off nicely, so I took the plane apart and figured I'd put the plane parts together wrong in the distant past. The blade bevel should go down and I'd had it facing up, so I turned it around and put the plane back together. It worked much better now. But then that got me thinking of Dad's plane I inherited from him years ago. I wondered how old it might be, and how it might work on my project. It took me several minutes of hunting in the basement to find it, as I always use the cheapo garage sale plane. I'm not sure why I didn't use Dad's. I do remember using it when I was a kid and didn't own my own plane.

Sunday, August 6, 2023

2007 Kubota BX24 Hydrostatic Drive Abrupt Stop in Reverse

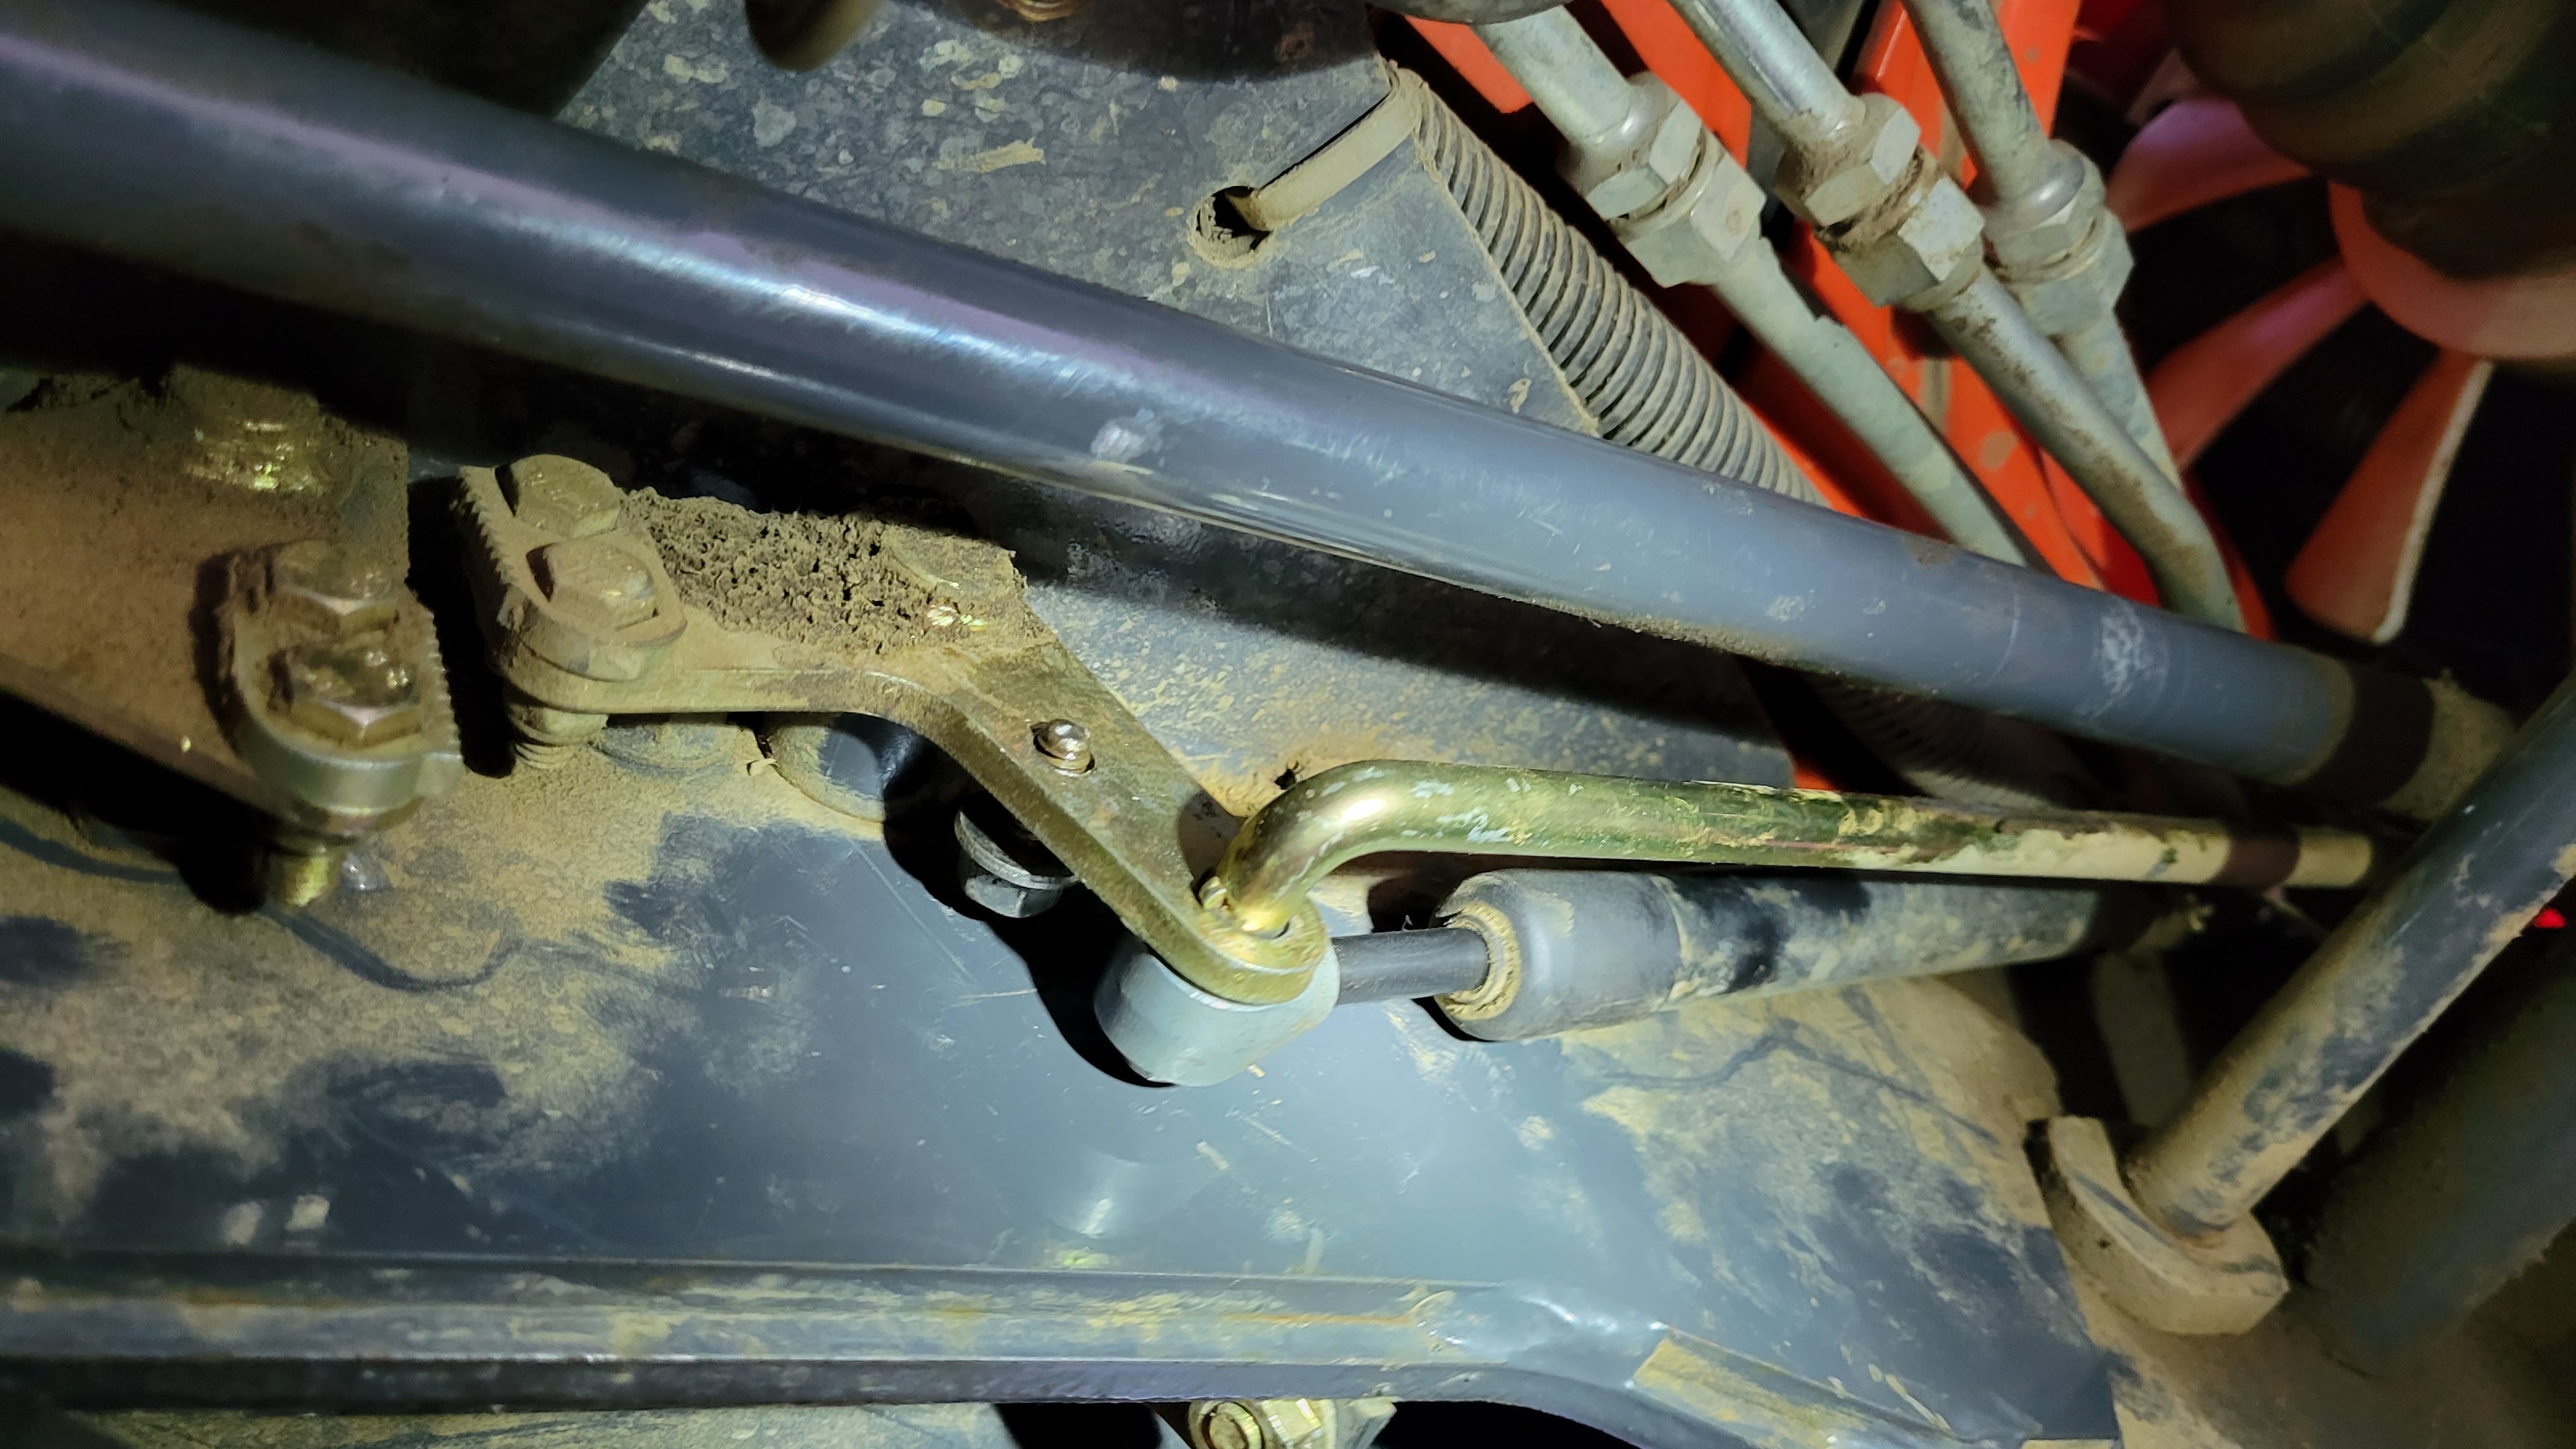
Anyone who owns a BX24 (or the "50-series" like BX1850/2350) knows of the issue these tractors had new from the factory regarding the abrupt stop when letting up on the reverse pedal. Mine is no exception. Recently I decided to do more investigating to see if anyone has come up with a solution, as Kubota never did issue a recall. I ran across a guy's posting on the internet that showed that he extended the lever arm that the damping gas strut acts on, which he said did solve the problem. I decided to give it a try. This first photo shows the original arrangement, with the gas strut attaching point being on the rod that runs back to the transmission from the foot pedal.

Tuesday, August 1, 2023

1950 Briggs and Stratton Model 23 9hp Engine from an AgriCat

I went to a garage sale and saw this engine sitting there with a $25 "as-is" price tag on it. Hmm, I can't pass that up now can I. So home it came. The guy selling it said he had the piece of equipment it came out of, an AgriCat mini dozer (the Briggs being replaced with a modern engine). He said this Briggs probably still ran  Uh-huh, sure. At least the crankshaft turned over and the engine had compression. What I don't understand is why he would sell the original engine out of a 1950 AgriCat. I'm not complaining by any means, it just doesn't make sense to me.

Monday, July 31, 2023

1986 John Deere 650 Tractor - More Repairs and Updates

A tractor like this that's seen more than its fair share of use and abuse, it's no wonder that there is never a shortage of things to do on it. Take the front loader bucket, for instance. Both sides are bent in at the leading edge. I'm not really sure how that happened but they are needing some help. More precisely, help from an 18" pipe wrench. This first photo is of the right side of the bucket.

Monday, July 24, 2023

1986 John Deere 650 Tractor Repairs and Updates

The engine has been difficult to start after the rebuild (same situation as before the rebuild), and was particularly difficult after the engine had been running for a while. Sometimes it had to set a spell before it decided to start again. I figured the best place to focus on first was injector pump timing. This timing evolution is sometimes called a "spill test". The instructions say to undo the injector lines at the pump, then pull out a "delivery valve" on injector pump #1 outlet, then install a suitable piece of tubing on top of the outlet. At certain points of crankshaft rotation, fuel will flow freely out of the tube since the delivery valve is removed, then at some point of crank rotation the flow will stop. This point is called "beginning of injection". That point should put a timing mark on the crankshaft pulley in line with the timing pointer.

Wednesday, July 12, 2023

1986 John Deere 650 Tractor Reassembly

I'd been waiting a week to get a new pressure plate delivered but it has now arrived. New pressure plate, you ask? Well, yes, the old one is broken and the broken bits are the reason the clutch wouldn't completely release when I first got the tractor home, thus grinding gears when shifting into gear. In the first photo below, the two metal tabs are 2/3 of what is supposed to pull the pressure plate away from the clutch disc when the clutch pedal is pressed down. Without those two tabs, the pressure plate stays somewhat engaged with the clutch disc. So, I had to order a new pressure plate. I didn't realize the broken status until I was installing the clutch and pressure plate onto the rebuilt engine, at which time I noticed something wasn't quite right. This little detour did save me money though, because if I'd purchased the pressure plate from the company I bought the engine gasket kit and parts from, it would have been about $40 more than the $60 I paid for the one I got off eBay.

Thursday, June 29, 2023

1986 John Deere 650 Tractor - New Mounting Pins for Loader

Here's a quick post about the pins I made for the loader. I had to drill out the old pins, as they were purt-near welded in place, it seemed. I found a two-foot chunk of 1-1/4" diameter round bar in the basement that I cut two 7-1/2" chunks from.

Sunday, June 25, 2023

1940s Homemade Garden Tractor Gets an Engine and Clutch

I've been busy working on the John Deere 650 lately so I haven't posted much on this homemade tractor. As I'd mentioned previously, I crudely mounted a 1947 Onan BH twin cylinder engine. Since then I permanently attached the engine and made a belt tensioning clutch assembly and belt guard. This first photo is with a trial belt that is too long.

Saturday, June 24, 2023

1986 John Deere 650 Tractor Engine Reassembly

Parts for my engine rebuild came in so it's now a simple matter of putting everything back together, right? First up was to press the new main bearings into the engine block. The front bearing presses directly into the block and the back bearing presses into a flanged casting that then bolts to the back of the block after the crankshaft is installed through the rear of the block. There is a funky center bearing on the crankshaft that is held in place by a large circular split casting. The crankshaft is installed into the block, then the center split casting is bolted to the block with one bolt. The rear bearing and seal flange is then bolted to the block. Here's a photo of the flange when I was removing the bearing:

Thursday, June 15, 2023

1986 John Deere 650 Tractor Engine Disassembly

This is a Yanmar 2T80UJ two-cylinder diesel engine. Yanmar made the engine (and the tractor) to JD specifications, and I understand it's not identical to any Yanmar-branded engine. Fortunately there are still some aftermarket parts available for these things.

The first step in this engine's disassembly process was to get the engine moved from the motorcycle jack to the engine stand. I took the plastic fan off first, as it already had chunks missing and I didn't want to cause any further damage. I then took the engine stand's main bracket (the black thing that bolts to the engine) off the stand (the red thing) and bolted the bracket onto the back of the engine, then jacked the MC jack all the way up to get the engine as close to the height of the engine stand as possible. I put a blanket over the engine so I didn't get covered in oil when giving it a bear hug to move it, then manhandled the engine from the jack to the stand, fitting the bracket's rear stub pipe into the pipe of the stand. It's one heavy little engine, let me tell you. I'm guessing 200+ pounds. And you may be wondering why I didn't use the engine hoist? It's got the loader hanging from it.

Friday, June 9, 2023

1986 John Deere 650 Tractor Engine Removal

With the loader out of the way, I moved forward with taking out the engine. The first step in engine removal is to remove the front frame and axle. Of course it is. Ok, so the reason is because the engine block is an integral part of the tractor frame. The front frame bolts directly to the engine block, and the engine block is bolted to the clutch housing.

To get the frame disconnected, I first needed to remove the rear support for the loader (another "of course"). The steering arm drag link needed to come free of the front steering knuckle, and wiring for lights (of which there currently aren't any) also needed to be fished out, then seven bolts are removed. I supported the rear half of the tractor with a jack stand, then used a floor jack to balance the front end and roll it away.

Thursday, June 8, 2023

1986 John Deere 650 Tractor Front Loader Removal - 10-hour Job

Yes, I caved and decided to remove the loader (like the service manual says to do, and frankly is required since the front axle and frame come off for engine removal) before going further on engine removal. Removing a loader isn't usually something worthy of writing a blog posting about. It's usually a fairly simple task of removing four pins, unhooking four hydraulic lines, and hoisting the loader off with an engine hoist or something similar. My tractor unfortunately is not simple. Nope. Removing this loader is about as far from simple as you can get without falling off the edge of the earth. The reason? Someone must have lost the two rear bottom pins and decided to make some. Problem was, the pins were made too large for the bushing bores and Big Bubba knocked them in with a 12-pound sledge hammer, I'm guessing. This first photo below is one of the pins. After about an hour of trying to beat one of them out with a 3lb sledge hammer, judicious application of heat from an acetylene torch, and an 18-inch pipe wrench with 2-foot pipe on the end (and getting absolutely nowhere), I decided something drastic was necessary.

Tuesday, May 30, 2023

1986 John Deere 650 Tractor Miscellaneous Repairs and Clutch Issues

Getting a tractor this old that has a modicum of electrical and electronic paraphernalia, it's bound to have been tampered with in the past. This tractor is the epitome of being tampered with. But I digress. The first order of business was to see if a new tachometer drive cable would get the tach working again. No telling how long it's been stuck at 4,906.3 hours. As you can see in the photo, the tach is now working. Not too sure about the hour meter yet.

Saturday, May 27, 2023

1986 John Deere 650 Tractor Transmission Repairs

I got this tractor kind of in pieces. The front and back halves of the tractor were bolted together when I bought it but that was only to help with moving it around. The tractor had to be split apart to put the transmission back together after someone had pulled it apart and abandoned it. This first photo is the tractor shored up in preparation for the split. I figured the front half was rear-heavy but I put the ladder and blocking there just in case I was wrong. Turns out I was correct, it was heavier to the rear of the front axle.

Friday, May 26, 2023

1986 John Deere 650 Tractor 4WD Splined Shaft Repair

Yesterday I decided to try and fix the broken front drive splined shaft on the JD 650. These first two photos show the before and after condition of the shaft.


Thursday, May 25, 2023

1986 John Deere Model 650 Diesel Tractor

Yeah, yeah, I just recently brought home the little bitty homemade tractor, but for some odd reason I couldn't pass this one up. It's part of my affliction of browsing the local online sale venues. This tractor is in need of a bit of work (no, really?), just the way I like them. It's a 1986 John Deere 650 tractor with a two-cylinder diesel engine and front end loader. It's got quite an impressive list of things going on: diesel engine, model 67 front loader, 4-wheel-drive, rear differential lock, 4-speed transmission with hi-lo auxiliary transmission (giving 8 forward speeds and two reverse), power steering, 3-point hitch, PTO. As the below photo shows (kinda), it's not currently running, so the previous owner is pulling it onto my trailer with his tired mini excavator.

Wednesday, May 24, 2023

1940s Homemade Garden Tractor

This little guy followed me home a few weeks ago. It was advertised in the local Craigslist as Yard Art (!). Well, I suppose it is pretty far gone, but that's not going to deter me from trying to get it going. This first photo below shows it in its natural habitat, waiting patiently for someone to come along and give it a little TLC. The lady who owned it said her late husband (Ron) built it on the farm in the Key Peninsula area of Pierce county.

Friday, April 28, 2023

More Wood Turning on the New HF Lathe

So far I'm putting the new/old wood lathe to good use. Ok, maybe not "good" use but it is getting used. I've had the lathe for almost a month. I've made three bowls, a candle holder, a dried flower holder, and two pens. This first photo is the latest, a candle holder. Next to it is a fused glass piece my wife made in her studio.

Monday, April 17, 2023

My First Woodturning Pen Project on the HF Lathe

New tools in the basement usually require new accessories. My new/old Harbor Freight wood lathe is no exception. Just setting up for pen turning required $56 worth of stuff: metric drill bits (yes, I've gone 60+ years without a set of metric drill bits), pen mill barrel trimmer, cyanoacrylate (CA) glue (so-called super glue), and glue activator. And then there's the pen kit. That was another $22 but I opted for a better quality pen.

Saturday, April 15, 2023

Central Machinery (Harbor Freight) Wood Lathe - Making a Spindle Handwheel

I noticed folks online talking about these Harbor Freight lathes not coming with a handwheel on the left side of the headstock spindle. They'd mention that the Jet JWL-1236 lathe had an available handwheel that might fit this HF lathe. After more searching, I did find in one case someone took the chance and actually did buy a Jet handwheel to see if it would work on their HF lathe, which it did. That was back when the handwheels were $33 shipped. Today (2023) that same handwheel is somewhere around $90 to $140, if you can find one. That price is out of the realm of most people buying one just to "see if it fits". Fortunately someone did the legwork back when they were cheaper. This first photo is a stock photo of the Jet handwheel that I grabbed off the net.

Saturday, April 1, 2023

Central Machinery (Harbor Freight) Wood Lathe T34706

Yes, I just got done saying in the last blog that I was keeping the ShopSmith wood lathe. Then this shows up in my basement.....

Tuesday, February 28, 2023

Shopsmith Model 10E Lathe/Tablesaw/Horizontal Borer/Drill Press/Disc Sander 5-in-1 Multi-tool

I purchased this Shopsmith (abbreviated SS) in January of 2020 but I am just now getting around to putting it on my blog. It is in very nice condition and appears to still be wearing its original paint. The motor is a different color but these early machines didn't come standard with a motor. It is an AO Smith motor, which seems to be what most of these older Shopsmiths are outfitted with. The base is a heavy, home-made wood affair with small steel casters. The SS didn't come with a base from the factory, so the new owner would have to make their own.

Monday, February 20, 2023

Pulsar Inverter Generator Hard Starting When Cold

Here's a quick little entry. I picked up this 2kw inverter generator a year ago for a screaming good deal, $279 plus tax and free shipping, from Home Depot. It's a great running generator once I get it started when cold. If it's a cold start though, look out. Get ready for 15 to 30 pulls of the cord before it springs to life. I thought that maybe there's some simple thing that is amiss, and I wondered if the twist knob that actuates the off/run/choke settings is maybe not fully closing the choke. So, off to the great YouTube to see if anyone else might be suffering this same malady. Lo and behold, there was.

Saturday, February 18, 2023

More 1966 Barracuda Post-Paint Reassembly

No, I still haven't gotten around to repairing and painting the trunk lid. Maybe soon... This blog post is to document a few things I did at the end of 2022 and up to now.

First up is a repair of a door armrest. The metal where a sheet metal screw threaded into had rusted away, so I very carefully welded in a piece of metal, being careful to not burn up the 56-year-old foam rubber.

Tuesday, February 14, 2023

2007 Kubota BX24 Little Surprise and Fuel Filter Replacement

A neighbor needed my help with my tractor a couple of weeks ago so I started it up and began the drive. I got 20 feet and the tractor basically died. Hmm, that's never happened before. It was about 30 degrees outside so I wondered if water was in the fuel lines. I first climbed under the tractor to see if the electric fuel pump was working ok. It seemed a little sluggish, so I popped a fuel line off the outlet of the pump and fuel pumped out fine. Next step was to check the fuel filter on the engine. That was an ordeal. In order to get pliers onto the spring clamps on the hoses, the front cowling had to come off. In order to remove the cowling, the hood had to come off. Why, Kubota? Just why? Anyway, after excavating the fuel filter, I pulled the inlet line off and turned the key on to start the pump. Here's what came out:

Saturday, February 4, 2023

2007 Kubota BX24 Plastic Hood And Cowling Crack Repair Using Hot Staple Welding

My Kubota hood was cracked when I bought the tractor in 2017. I finally decided to do something about it and bought a $24 kit on Amazon to do hot staple welding. Below is a photo of the cracked area. It is at the hood latch. Maybe something dropped on the hood and cracked it, who knows.

Thursday, December 29, 2022

Whittling Down Some Small Parts For The Barracuda On The Unimat Lathe

It's not often I have a project small enough to use the Unimat DB200, so when this project presented itself, I took advantage of it. The rocker molding on my 1966 Barracuda uses nylon/plastic "push rivets" to hold the bottom edge of the molding to the car. They are small plastic things that have fingers which are pressed through a hole in the molding, then through a hole in the car's rocker panel, after which the center pin is driven in with a hammer to expand the fingers outward, keeping the rivet in place. A flange on the outer end of the rivets holds the molding flush to the car. Below is a photo showing an original white rivet next to some black ones I found at O-Reilly Auto Parts.